Winterizing Your Hay Baling Equipment

As fall marches on, we can sense winter rapidly approaching. Harvest has gone from full swing to slowly fading. For many folks, this signals the time to get those fall chores done to prepare for winter. For those of us with agricultural equipment, it’s the best time to clean up and service our machines so that when spring rolls around again they’ll be ready to use. Here’s a checklist we created to help you keep your machinery in tip-top condition.
Common Tasks for all Implements
- Clean off debris. Sweep away crop residue from your equipment. Mice love to nest in grass clippings and the like and are destructive to your equipment. Their droppings will promote corrosion. Remove guards and clean out everything, preferably with compressed air. If you use water, make sure you do not spray directly on bearings and seals, and be certain everything has a chance to fully dry out before storing.
- Grease the bearings. Where there are grease zerks, use a grease gun and pump grease in until you start to see it being forced out of the joints. If the bearing is packed full of grease, then there is no room for moisture to collect.
- Grease the PTO drivelines. Be sure to take the shaft apart and put grease inside the telescoping shaft so it stays lubricated. The plastic outer guards usually have one of more grease points on each end. Grease the universal joints on both ends.
- Change the oil in the gearboxes. Do this just after running the implement, when the oil is still warm and fully mixed. Warm oil will carry away moisture better than cold oil.
- Cover any bare metal with a coat of grease or suitable rust preventative. The grease will stay put and protect the surface for a long time. Vegetable based shortening is an alternative for protecting surfaces that will come into contact with feed or hay.
- Nonmoving surfaces of exposed bare metal should be painted in lieu of greasing to prevent rust. Clean the surface thoroughly before painting.
Square Baler
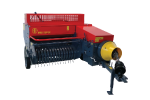
- Clean out the bale chamber so it does not rust where the bale contacts the steel.
- Clean the area around the knotter so the hay dust does not hold moisture and create an environment friendly to mice.
- Remove the bolt that holds the knotter down and raise the knotter up. Coat the bill hook and anything else not painted with grease or oil.
- Oil the drive chains.
- Check the condition of the pickup belt and replace if worn or damaged.
- Under the knotter there is a knife to cut the twine. Coat the knife edge with grease or oil to keep it from rusting.
- Grease the bearings and universal joints per the owner’s manual.
- Put new twine in the twine box and thread the twine so the baler is ready to tie.
Round Baler
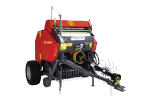
- Take the covers off and sweep or blow away the debris.
- Grease the bearings and universal joints per the owner’s manual.
- Oil the drive chains.
- Twine wrap balers have a razor blade to cut the twine. Coat this with grease or oil to preserve the edge from rust, or replace the blade if it has become dull.
- Check your stock of netting or twine and restock as needed.
Sickle Bar Mowers
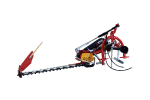
- Clean the cutter bar and coat with grease to prevent rust on the cutter knives.
- Check the condition of the drive belts and replace worn or damaged belts.
- Replace the gearbox oil.
- Grease all grease points per the owner’s manual.
- Check that the machine is well secured if stored in the upright position. To prevent injury, tie the top of the cutter bar off to a wall or pole to keep it from falling over, and place the guard on the cutterbar.
Disc Mowers

- Turn the blade holders (turtles) by hand to check that the machine turns freely.
- Check the condition of the drive belts and replace worn or damaged belts.
- Inspect the blades and replace them as sets if needed.
- While the blade holder bolts are off, inspect them for wear also.
- Check the curtain for small rips or tears and repair before they become larger.
- Replace the gearbox and cutterbar oils.
- Grease all grease points per the owner’s manual.
- Do not store the cutterbar in the vertical position. Some disc mowers have breather plugs on the cutterbar and can leak over time if left vertical.
Drum Mowers
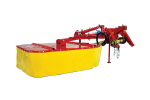
- Check the blades and replace if needed. Always replace in full sets to maintain the balance of the drums.
- Check the curtain for small rips or tears and repair before they become larger.
- Replace the gearbox oils.
- Grease all grease points per the owner’s manual.
Rotary Mowers
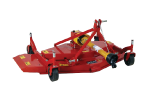
- Remove debris and scrape off the grass stuck to the underside of the deck to reduce rusting.
- Check the condition of the drive belts and replace worn or damaged belts.
- Grease all grease points per the owner’s manual.
- Sharpen blades or install new blades.
Rakes
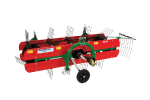
- Thoroughly clean and remove dust and debris.
- Grease all grease points per the owner’s manual.
- Check for broken and bent tines and replace as needed.
- For PTO driven rakes, check the condition of the drive belts and replace worn or damaged belts.
Oct 20th 2016
Recent Posts
-
Haying Independence
In this month’s blog, let’s take a deeper look at the foundation of what we here at Tractor To …Apr 1st 2024 -
Be On the Cutting Edge of Modern Market Gardening Using Raised Bed Systems: FULL-TILL, MINIMUM-TILL, and NO-TILL
Market gardening is the production of vegetables, fruits, flowers and other plants on a scale larger …Mar 1st 2024 -
No Loader? No Problem.
So you have a compact tractor on your small farm, but you don’t have a front loader. Maybe price put …Feb 1st 2024


